Mail Client Settings
![]()
Outlook 2000 Mail Client Settings
Step 1: Right click on the Outlook icon on your desktop and select properties. Select the “Show Profiles” option.
Note: If you
don't see the mail setup dialog box after selecting properties on
the Outlook icon, you can get to this setting by selecting
Start>Settings>Control Panel in the Windows
interface, then selecting the “Mail” icon.

Step 2: Select
your profile and then click on the “Properties”
button.
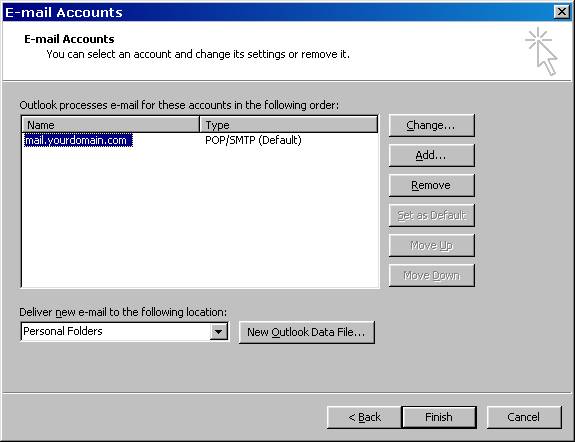
Step 3: Click on
the “E-mail Accounts” button.

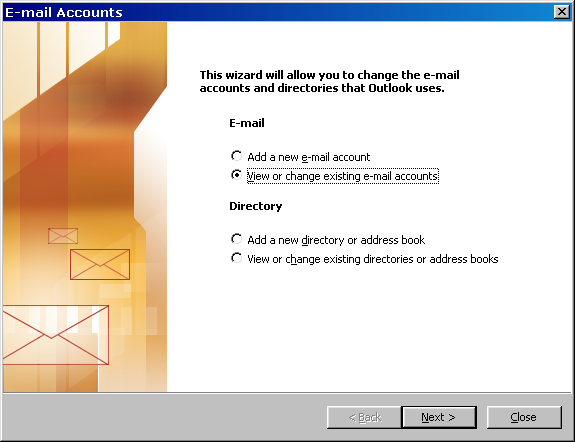
Step 4: Select “View or change existing e-mail accounts” then hit “Next”.
Note: In some
versions of the Outlook client you will see a different looking
dialog box that will give you the option to Add, Change, or
Remove. If you see this dialog, choose the Change option.
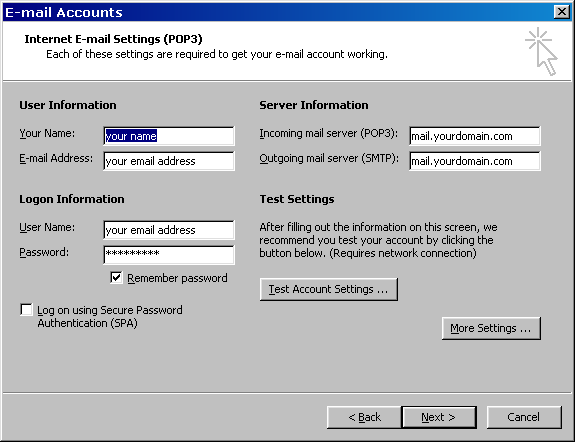
Step 5: Make sure the settings in the following window are filled out as seen below, using values relevant to your particular email account and domain. Under “Logon Information”, be sure to put your full email address in the “User Name” field.
Step 6: Select
the “More Settings” box in the lower right hand
corner.
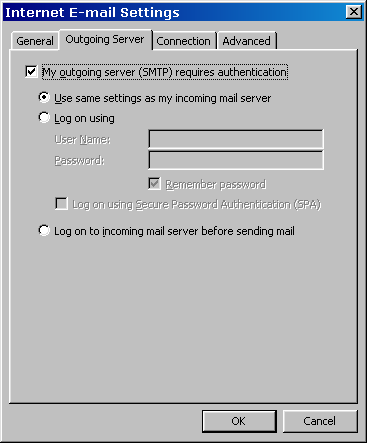
Step 7: On the “Internet E-mail Settings” box, select the “Outgoing Server” tab. Check the “My outgoing server (SMTP) requires authentication” box, then go to the “Advanced” tab in the upper right hand corner.
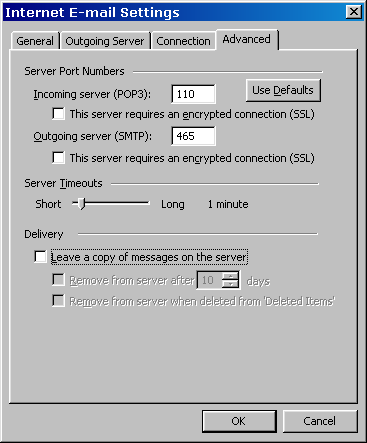
Step 8: Change the “Outgoing server (SMTP) value from the default of 25, to 465
The
rest of the settings should match those seen below. Now hit the
“OK” button to save your changes.
Step 9: Select
“Finish” to exit the configuration wizard. Try
hitting Send/Receive in your email client to check whether it is
working properly. If you are still not sending or receiving mail,
try closing your Outlook client and then opening it back up.